How To Install Aluminum Pipe Fittings On a Boat
Marine piping systems serve as the vital arteries for a ship's propulsion, water supply and drainage, hydraulic, and ventilation systems, directly influencing navigational stability and safety. Compared to traditional steel piping, aluminum alloy piping offers advantages such as light weight, high strength, corrosion resistance, resistance to marine salt spray, and immunity to rust. Consequently, it is widely used in modern small-to-medium-sized vessels, yachts, and specialized service ships, making it a preferred material for marine piping today.
Marine aluminum alloy piping installation must accommodate challenging operating conditions—including vessel pitching, vibration, high salt spray, and high humidity. Furthermore, because aluminum piping is relatively soft and prone to deformation, a meticulous installation process is essential to ensure construction quality.
I. Pre-installation Preparations
The environment for marine grade aluminum pipe installation is far more complex than that for land-based piping; therefore, meticulous preliminary preparation is crucial to ensure the precise matching of pipes and fittings and to prevent potential installation issues.
1. Verification of Pipe and Fitting Selection
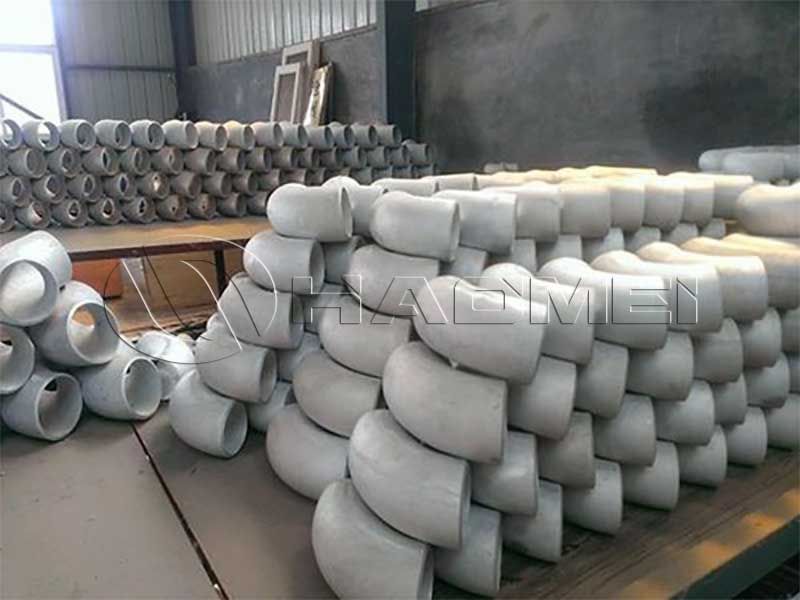
Appropriate aluminum alloy fittings—including flanges, elbows, tees, compression fittings, valves, and sealing rings—must be selected based on the piping's application, medium pressure, and diameter specifications. All pipes and fittings must be made of marine-grade aluminum alloy of a consistent material grade; mixing different materials is strictly prohibited to avoid corrosion or loosening caused by incompatible thermal expansion coefficients or poor fit. Additionally, fitting dimensions must be rigorously verified to ensure a perfect match with the pipe's outer diameter and wall thickness, thereby preventing poor seal integrity or loose connections.
2. Pipe Pre-treatment, Cleaning, and Deburring
Pipes should be cut using a specialized aluminum pipe cutter to ensure the pipe ends are flat and the cut is perpendicular to the pipe axis, eliminating defects such as slanted cuts, burrs, or cracks. After cutting, a chamfering tool is used to remove internal and external burrs, preventing damage to sealing components during assembly that could lead to seal failure. Finally, pipe ends, fitting connection surfaces, and flange sealing faces are wiped with acetone or anhydrous alcohol to thoroughly remove oil, dust, and metal debris, ensuring the connection surfaces are clean and dry to provide a solid foundation for a secure seal.
3. Inspection of Tools and Installation Conditions
Prepare specialized installation tools such as press-fitting tools, torque wrenches, and spirit levels. Do not use tools intended for steel pipe installation, as this could crush or damage the aluminum pipes and fittings. Inspect the flatness of the ship's mounting surface beforehand, clear away construction debris, and avoid areas subject to severe vibration to ensure the installation environment complies with marine piping standards.
II. Core Installation Procedures
The key to installing marine aluminum piping lies in ensuring a precise fit, uniform stress distribution, and a tight seal between pipes and fittings. Installation procedures must be strictly executed according to the specific characteristics of the aluminum tubing and fittings and the pipeline's pressure rating, ensuring suitability for the ship's dynamic operating conditions.
1. Installation of Straight Pipes, Ferrules, and Clamps
Ferrules and clamps are commonly used for low-pressure piping systems, such as water supply, drainage, and ventilation. During installation, first mark the pipe insertion depth to prevent improper insertion. Slide the ferrule nut and ferrule onto the pipe in sequence, apply specialized lubricant to the threads, insert the pipe fully into the fitting, and hand-tighten the nut to position it. Use a multi-step tightening process: once the torque reaches the critical point, tighten the nut an additional half-turn to ensure the ferrule's cutting edge embeds evenly into the pipe wall, creating a secure, interlocking connection. After installation, inspect the pipe for twisting or deformation and verify that the ferrule is embedded evenly without misalignment, ensuring a stable connection capable of withstanding vibration.
2. Flange Connection Installation (Medium- and High-Pressure Pipelines)
Medium- and high-pressure pipelines—such as those for marine fuel and hydraulics—utilize flange connection methods, which demand exceptional sealing and stability. Before installation, verify the parallelism of the flange faces and ensure any deviation remains within specified limits. Center the specialized marine gasket, ensuring it is neither misaligned nor damaged. Precisely align the pipe with the flange, adjust the pipe's level, and ensure the flanges are parallel and bolt holes are perfectly aligned; forced installation of misaligned components is strictly prohibited. Tighten bolts using a cross-pattern, multi-step sequence to ensure even pressure. Strictly control bolt torque to prevent flange deformation or uneven gasket loading, thereby eliminating the risk of high-pressure leaks.
3. Installation of Elbows and Tees
Elbows and tees must be installed at locations where the pipeline changes direction, branches off, or converges. The core objective of installation is to minimize flow resistance and avoid stress concentrations. During construction, pipeline lengths should be optimized and the use of unnecessary fittings minimized to reduce flow losses. When installing elbows, ensure the interfaces are coaxially aligned and free from kinking or twisting; for tees, precisely calibrate the branching angle to ensure balanced stress distribution across the pipeline. All joints must be sealed according to specifications: press-fit fittings must be fully compressed, and threaded fittings wrapped with specialized sealing tape to withstand the motion of the vessel and prevent leakage.
4. Installation of Valves and Compensators
Valves must be installed to align with the direction of fluid flow and connected coaxially to the pipeline, using fittings that strictly match specifications. Post-installation, perform manual opening and closing tests to ensure smooth operation and a tight seal. Aluminum alloy piping is susceptible to thermal expansion and contraction due to marine temperature fluctuations; therefore, specialized aluminum compensators must be installed on long-run pipelines. These must provide the standard expansion allowance to counteract thermal stress and prevent joint cracking or loosening. Additionally, specialized supports should be used to secure the pipeline and dampen the impact of hull vibrations on the joints.
III. Final Inspection and Testing
Upon completion of the pipeline installation, a comprehensive inspection is required to identify potential issues and ensure long-term, stable operation.
1. Visual and Joint Re-inspection
Thoroughly inspect all fitting joints to confirm there is no looseness, deformation, or seal misalignment. Check that the pipeline is laid evenly, free from twisting or stress concentrations, and verify that all installation positions and angles comply with marine piping design standards.
2. Pressure and Sealing Tests
Conduct hydrostatic or pneumatic tests in strict accordance with marine regulations. Test pressures must be 1.25 times the working pressure for low-pressure lines and 1.5 times for medium- to high-pressure lines. Maintain the test pressure for at least 30 minutes, monitoring continuously to ensure there are no leaks at the joints and no sudden drops in pressure, thereby confirming seal integrity.
3. Anti-corrosion and Protective Treatment
Clean away any residual debris from pipeline joints. Apply specialized anti-corrosion treatments to cut ends and connection gaps, using coatings specifically designed for aluminum alloys to protect against corrosion caused by marine salt spray and humidity. Finally, organize the piping and securely fasten all brackets and clamps to prevent interface wear or loosening caused by vessel vibration, thereby extending the overall service life of the piping system.
Original Source:https://www.marinealu.com/a/how-to-install-aluminum-pipe-fittings-on-a-boat.html
Tags: Aluminum pipe fitting ,