Best Welding Practices for Marine Aluminum Rectangular Tubing
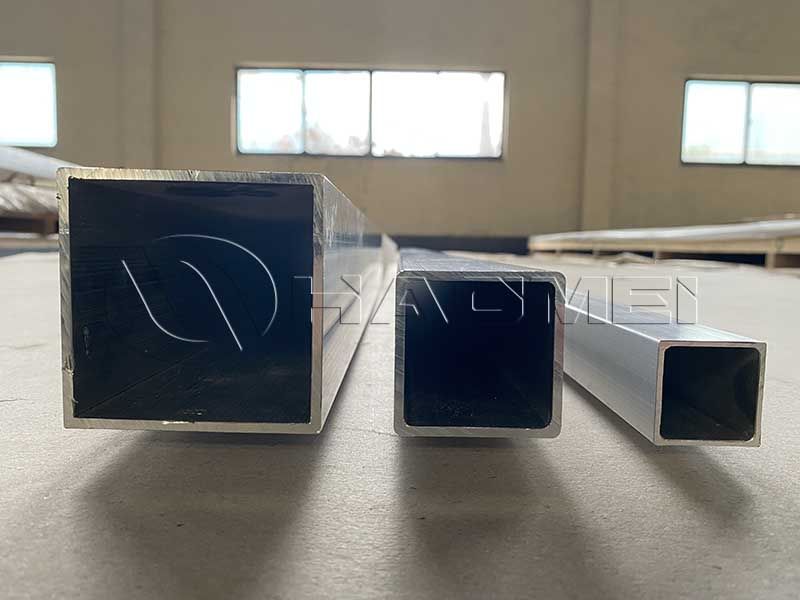
Marine aluminum rectangular tubing is widely used in boat frames, railings, docks, gangways, equipment supports, and lightweight structural fabrications. Its excellent strength-to-weight ratio and natural corrosion resistance make it an attractive choice for saltwater environments. However, welding aluminum for marine service requires more than simply producing a visually acceptable bead. Heat control, filler selection, surface preparation, corrosion protection, and inspection all directly affect long-term reliability.
Whether purchasing material from aluminium extrusion pipe suppliers or fabricating custom marine structures in-house, following disciplined welding procedures helps prevent premature cracking, distortion, and corrosion.
Select the Right Base Material and Filler Metal
Marine fabricators commonly use 5xxx-series aluminum alloys, such as 5083, 5086, and 5052, because they offer good corrosion resistance and weldability. Some structural applications also use 6xxx-series extrusions, including 6061-T6, although these alloys lose strength in the heat-affected zone after welding.
For many marine aluminum welding jobs, 5356 filler wire is a preferred option. It is commonly used with 5xxx and 6xxx base metals because it provides relatively high strength, good color matching after anodizing, and strong resistance to saltwater exposure. Its magnesium content also makes it suitable for applications where the welded assembly will experience vibration, load cycling, or outdoor marine service.
However, filler metal selection should not be automatic. For certain alloys, joint designs, or elevated-temperature applications, 4043 filler may be preferable because it offers better fluidity and reduced crack sensitivity. Always confirm compatibility between the base alloy, filler metal, service environment, and applicable marine or structural codes.
When welding aluminium boat extrusions, identify the alloy and temper before starting. Unknown material can lead to unsuitable filler selection, inconsistent weld penetration, or unexpected corrosion performance.
Clean Thoroughly Before Welding
Aluminum develops a thin oxide layer almost immediately when exposed to air. Although this layer helps protect the metal in normal conditions, it has a much higher melting temperature than the aluminum underneath. If it is not removed before welding, it can cause porosity, lack of fusion, contamination, and unstable arc behavior.
A proper cleaning procedure should include the following steps:
Remove oils and grease. Use a clean solvent such as acetone or an approved aluminum-safe degreaser. Avoid using contaminated rags that may spread oil across the surface.
Mechanically remove oxide. Use a dedicated stainless-steel wire brush, abrasive pad, or clean carbide tool. Tools used on carbon steel should never be used on aluminum, because iron contamination can initiate corrosion.
Clean immediately before welding. Aluminum oxide reforms quickly. Ideally, weld within a short period after mechanical cleaning.
Prepare the joint edges. Remove burrs, saw-cut contamination, sharp corners, and embedded debris. For thicker walls, beveling may be required to achieve full penetration.
For TIG welding, use clean tungsten electrodes, high-purity argon shielding gas, and properly maintained gas lines. For MIG welding, keep wire feeders, liners, drive rolls, and contact tips clean to prevent feeding problems and contamination.
Control Heat to Minimize Distortion
Heat distortion is one of the most common challenges when welding thin-wall aluminum tubing. Aluminum conducts heat rapidly and expands significantly when heated. Rectangular sections can twist, bow, or pull out of square if weld heat is not controlled.
Several practices can reduce distortion:
Use the lowest practical heat input while still achieving adequate fusion.
Choose appropriate travel speed and avoid excessively wide weld beads.
Use intermittent or stitch welding when the design allows.
Balance welds around the section rather than completing all welds on one side first.
Use strong fixtures, clamps, and tack welds to maintain alignment.
Weld from the center outward when possible, allowing shrinkage to distribute more evenly.
Consider backing bars or heat sinks for thin material, especially on visible surfaces.
Avoid excessive preheating unless it is specifically justified by material thickness, ambient temperature, or procedure requirements. Overheating aluminum can enlarge the heat-affected zone, reduce mechanical properties, and increase distortion. In 6xxx-series alloys, welding will locally reduce the strength associated with the original T6 temper, so designs should account for this reduction.
Manage Post-Weld Corrosion Risks
A sound weld is not automatically a corrosion-resistant weld. In marine environments, corrosion concerns often arise from trapped moisture, salt deposits, crevices, and dissimilar-metal contact.
After welding, remove soot, residue, spatter, and loose oxide from the weld area. Although aluminum does not rust like steel, surface contamination can hold moisture and chlorides against the metal. Saltwater deposits should be rinsed away regularly during service.
Pay close attention to crevices around brackets, lap joints, fasteners, and end caps. Water trapped inside tubing can cause internal corrosion that remains hidden until structural damage becomes severe. Seal open ends where appropriate, but provide drainage or ventilation when complete sealing is impractical.
Galvanic corrosion is another major concern. Aluminum can corrode rapidly when it contacts stainless steel, carbon steel, copper alloys, or other dissimilar metals in the presence of seawater. Use insulating washers, nonconductive gaskets, compatible coatings, and properly selected fasteners to isolate materials.
If the finished part will be painted, powder coated, or anodized, follow the coating supplier’s pretreatment requirements. Coatings should not be used to hide poor weld quality; they should be applied only after the welds are clean, inspected, and properly prepared.
Inspect Welds Before Putting the Structure into Service
Visual inspection is the first and most important step. Check for cracks, undercut, overlap, incomplete fusion, excessive reinforcement, crater cracks, porosity, and inconsistent bead profile. Marine welds should have smooth transitions into the parent material, particularly in fatigue-sensitive areas.
Also verify dimensional accuracy after welding. Rectangular tubing may appear acceptable visually while being twisted or bowed enough to create assembly issues. Use straightedges, squares, fixtures, and measurement tools to confirm that the final component remains within tolerance.
For critical structural applications, additional nondestructive testing may be required. Dye penetrant testing can reveal surface-breaking cracks, while radiographic or ultrasonic inspection may be used to evaluate internal discontinuities in thicker or higher-consequence welds.
Finally, document welding parameters, filler wire, shielding gas, cleaning methods, and inspection results. Consistent records support repeatable production quality and simplify troubleshooting if corrosion or cracking appears later.
By combining 5356 filler wire selection, disciplined cleaning, controlled heat input, corrosion-aware design, and thorough inspection, marine fabricators can produce aluminum tubular structures that remain strong, attractive, and dependable in demanding saltwater conditions.
Original Source:https://www.marinealu.com/a/best-welding-practices-for-marine-aluminum-rectangular-tubing.html
Tags: aluminium boat extrusions ,